Animation:
Editing:
Editing on The Piper was the first time i really used After effects to its full advantage, as i haven't had much experience with After Effects i asked my may friend Frank Mansfield for some advice. There were 6 main shots where I used After Effects for: rig removal, light tracking, colour correction and green screen removal.


 I edited the film as I went along, animating in the day and adding in the new
shots on the night. The dead line on completing this Film was the tightest it
has been for me. on the day before hand in I finished animating the final shot
with the Piper and all 7 kids at 5pm and was up editing in the final shots,
making the final touches, fully syncing up the music and adding in the sounds
fx till 7am of the day of Hand in. I uploaded the film on to Vimeo, did the
last part of the right up and handed in all my work.
I edited the film as I went along, animating in the day and adding in the new
shots on the night. The dead line on completing this Film was the tightest it
has been for me. on the day before hand in I finished animating the final shot
with the Piper and all 7 kids at 5pm and was up editing in the final shots,
making the final touches, fully syncing up the music and adding in the sounds
fx till 7am of the day of Hand in. I uploaded the film on to Vimeo, did the
last part of the right up and handed in all my work.
 Reactions:
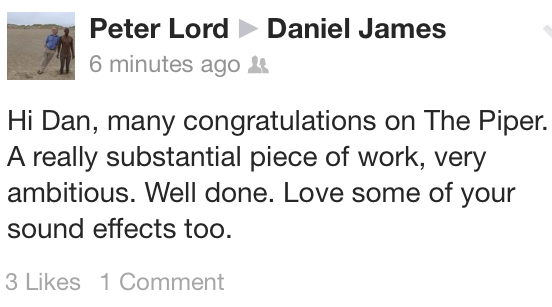
I had The Piper online viewable to the public for 2 days after it was completed, and in that time that feedback has been amazing! I sent the link to a large number of animation friends and here are some of their brilliant comments.


 I'd like to take this opportunity to say a massive thank you to everyone who
has watched The Piper and commented on it as means a lot! To the ones who have
no seen The Piper yet it will be back online once the festival runs are over.
I'd like to take this opportunity to say a massive thank you to everyone who
has watched The Piper and commented on it as means a lot! To the ones who have
no seen The Piper yet it will be back online once the festival runs are over.
With the puppets and set completed it was time to get animating on the film.
Due to story points I had to shoot a dream sequence and one of the last
shots for the film first, it had to be done this way as I needed the park set
to be fully clean. Once all the shots were completed I had to take a week out of
animating and messy the park up, add a fence and trees. In planning my
animation time sheet I had to shoot the story in chunks all facing the same
camera angels. This was important to get right as the sun is setting toughout
film and I was painting the background by hand as I went on.

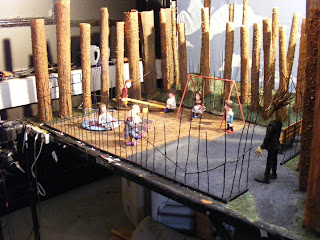 The first two weeks of animating were with all that kids paying on the
equipment in the park. These were all shot of two's at 25 fps as i wanted the
kids animation to have a more classic children's tv show vibe. However the
Piper himself was animated on ones this was to give him more fluid movements
and allow him to play his pipe in sync, it also helps to sell the fact that The
Piper is not from this world and gives him a very different feel. Here is a
slide show that shows the animation process and the order I shot the film in.
The first two weeks of animating were with all that kids paying on the
equipment in the park. These were all shot of two's at 25 fps as i wanted the
kids animation to have a more classic children's tv show vibe. However the
Piper himself was animated on ones this was to give him more fluid movements
and allow him to play his pipe in sync, it also helps to sell the fact that The
Piper is not from this world and gives him a very different feel. Here is a
slide show that shows the animation process and the order I shot the film in.


Editing on The Piper was the first time i really used After effects to its full advantage, as i haven't had much experience with After Effects i asked my may friend Frank Mansfield for some advice. There were 6 main shots where I used After Effects for: rig removal, light tracking, colour correction and green screen removal.


I had The Piper online viewable to the public for 2 days after it was completed, and in that time that feedback has been amazing! I sent the link to a large number of animation friends and here are some of their brilliant comments.